We are focused on the reliability of our cables rather than the time of assembly,
still it takes only a few minutes to make one patch.

1. You will need a sharp knife, any paper cutter will do. Everything else is provided.
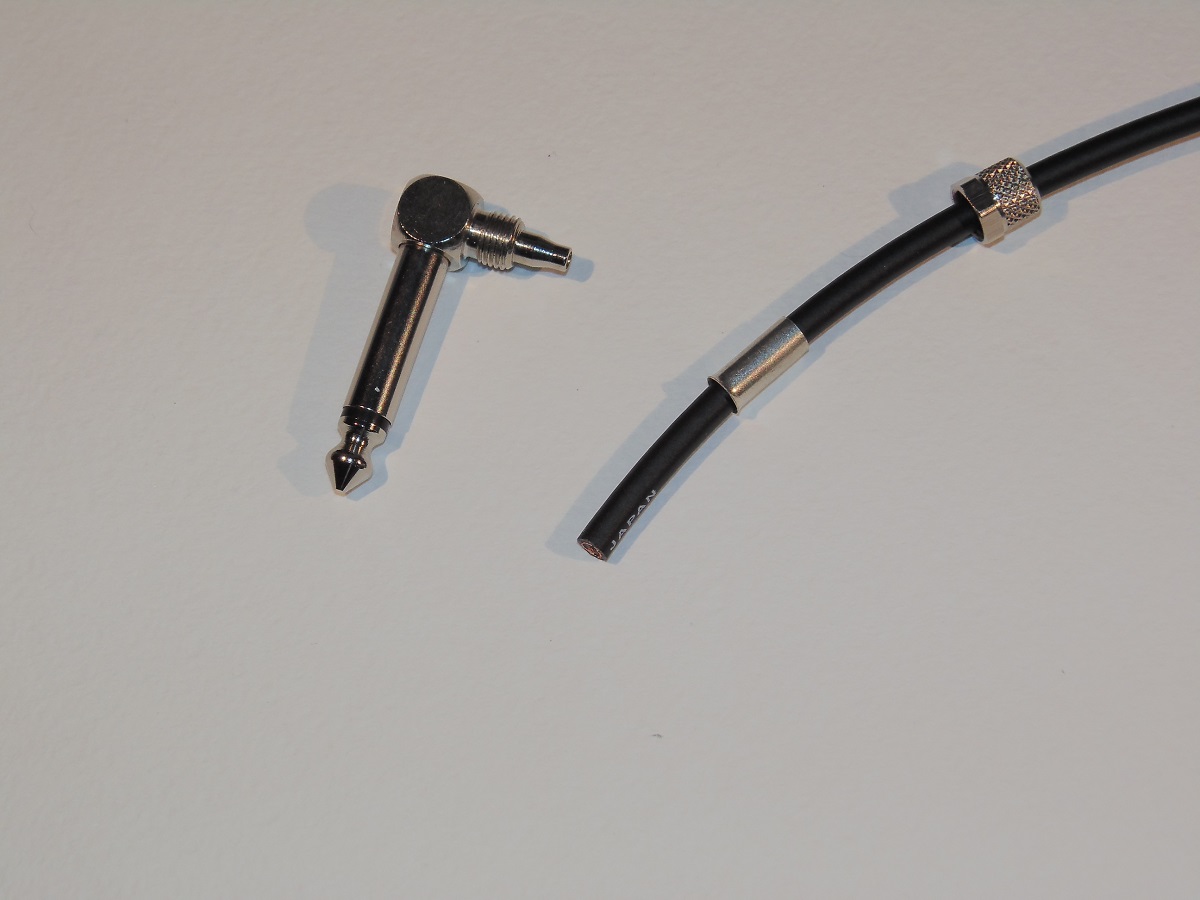
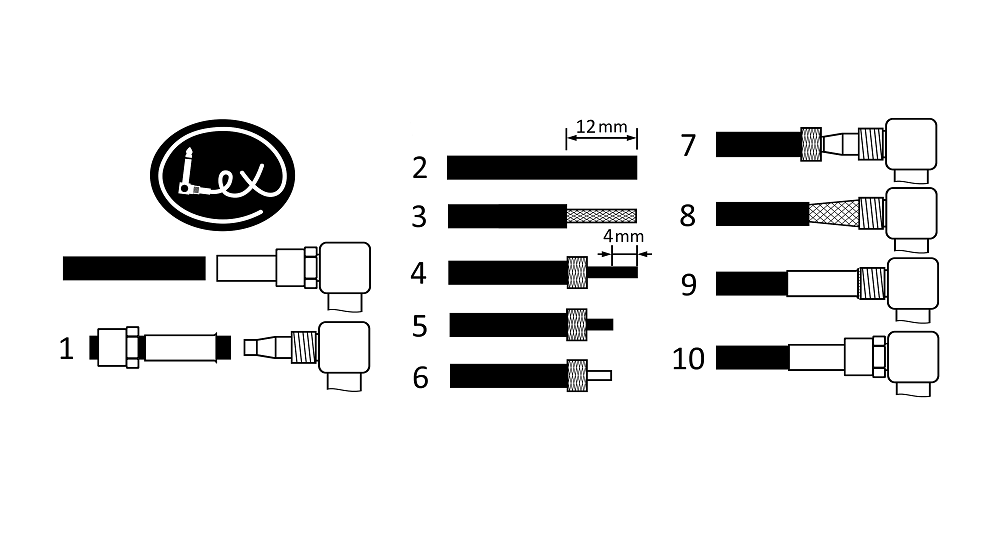
2. Unscrew the connector and put the nut and the tube over the cable. Don’t forget to do this when assembling the second jack!
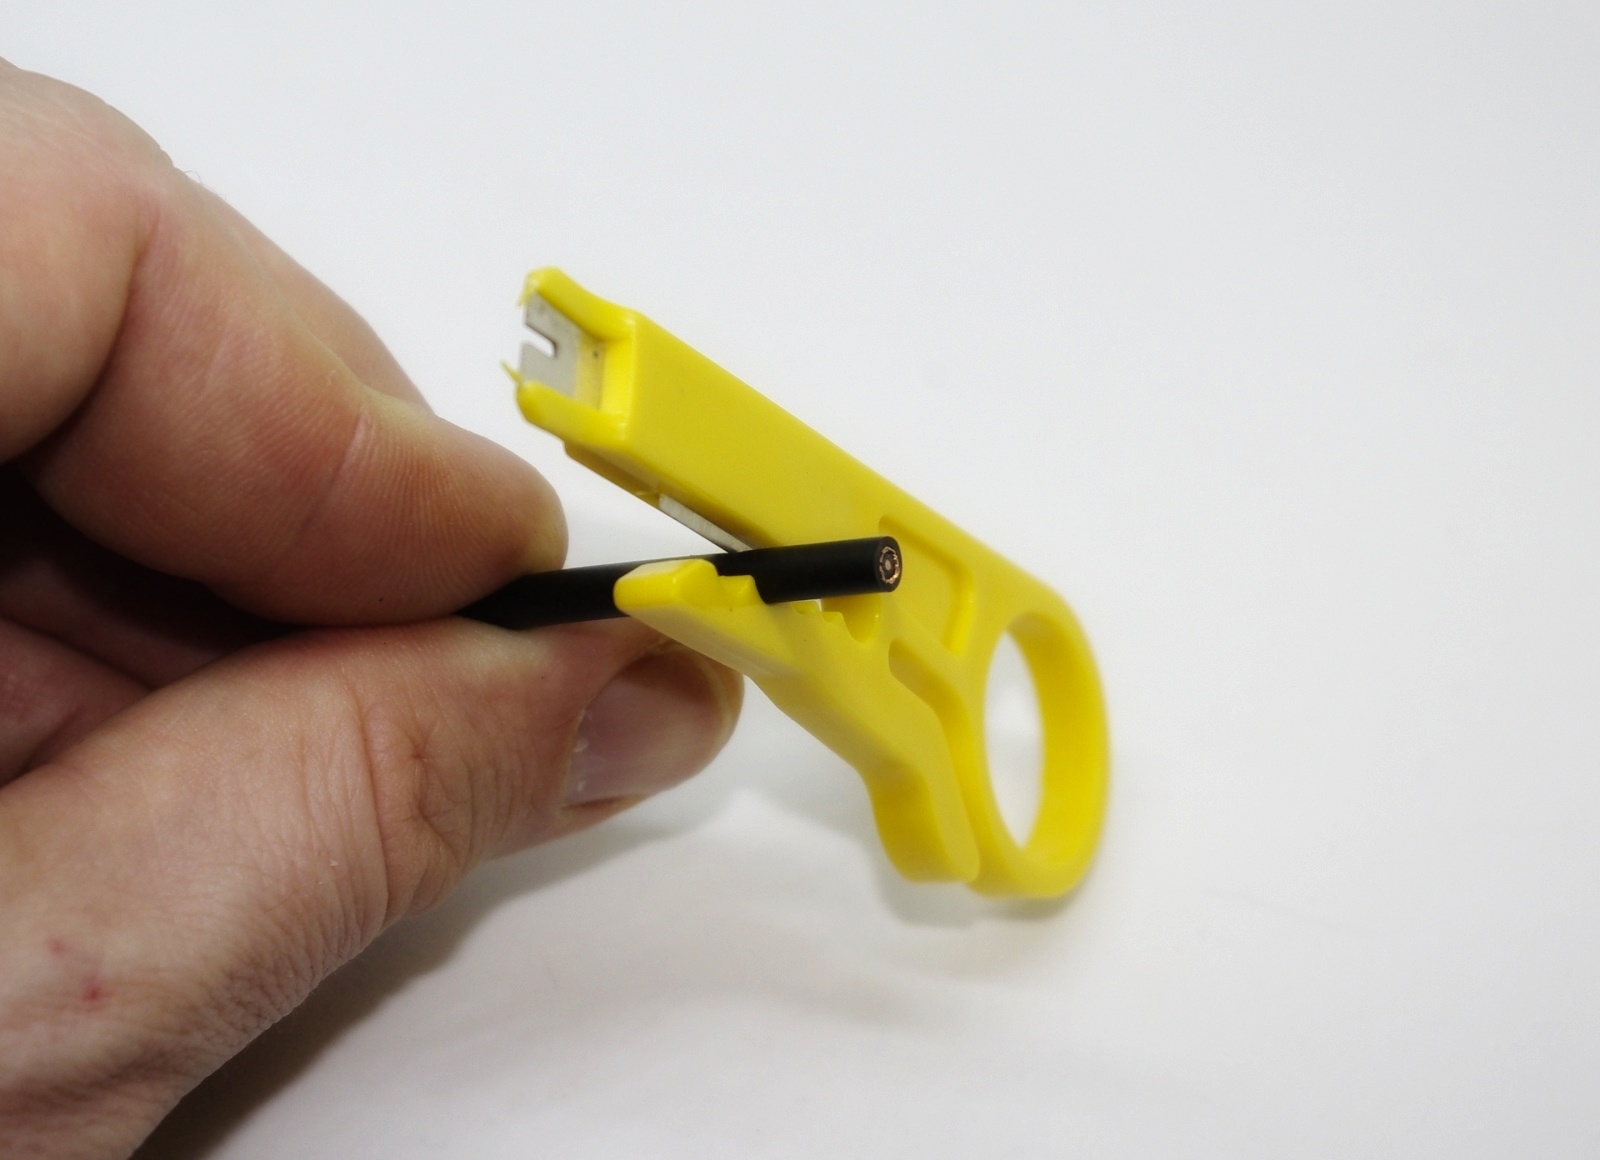
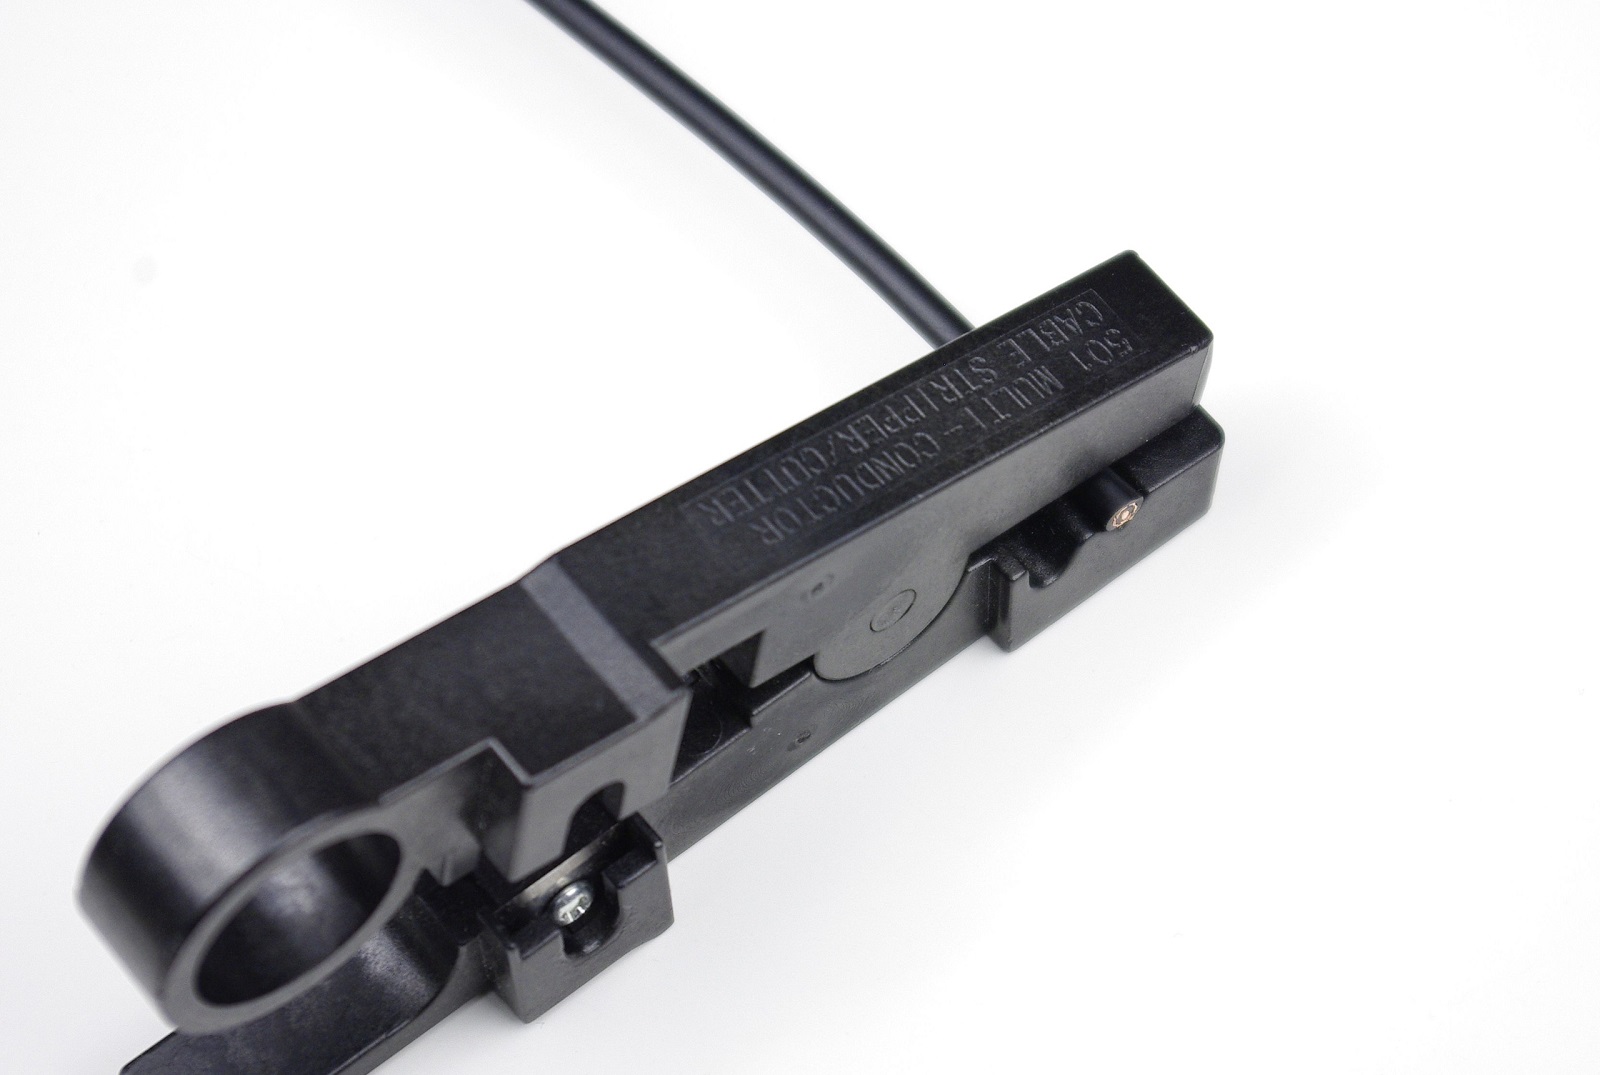
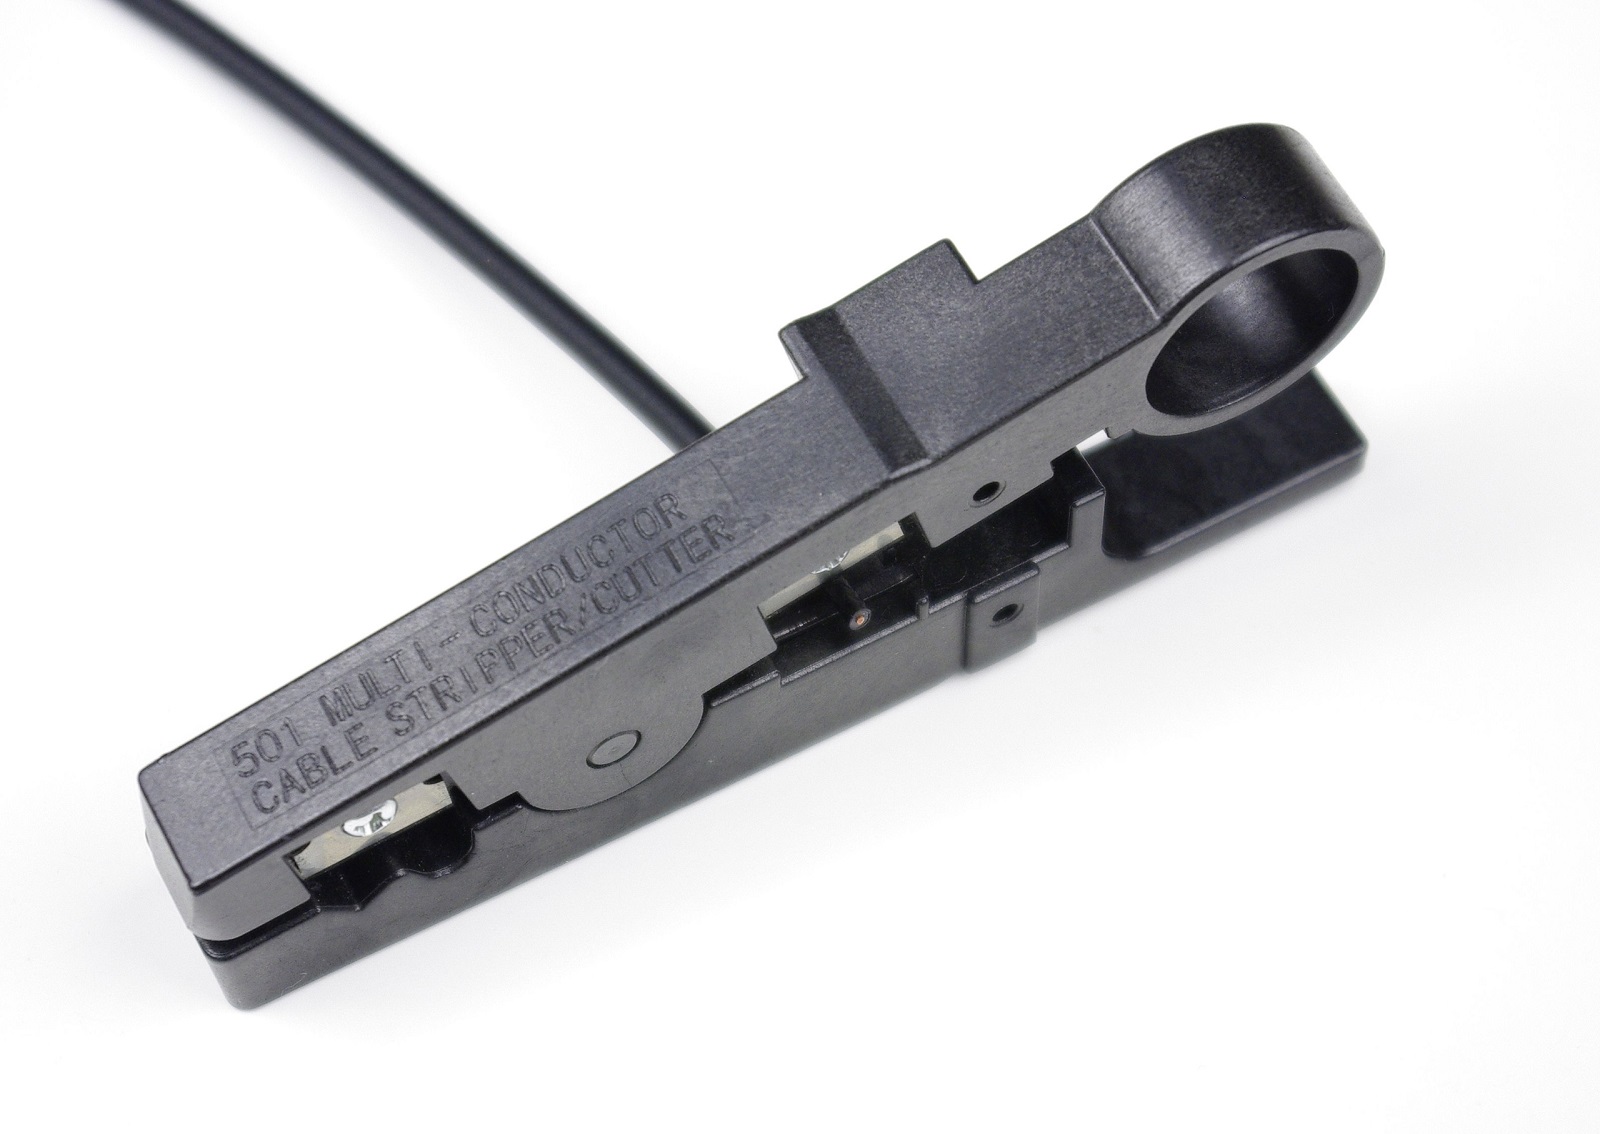
3. Each kit contains stripper cutter, to cut off wire isolation. Put the cable into the second slot of the stripper and cut 12 mm (0,47 inches) of isolation. Pull the trigger near the stripper's ring to open it.
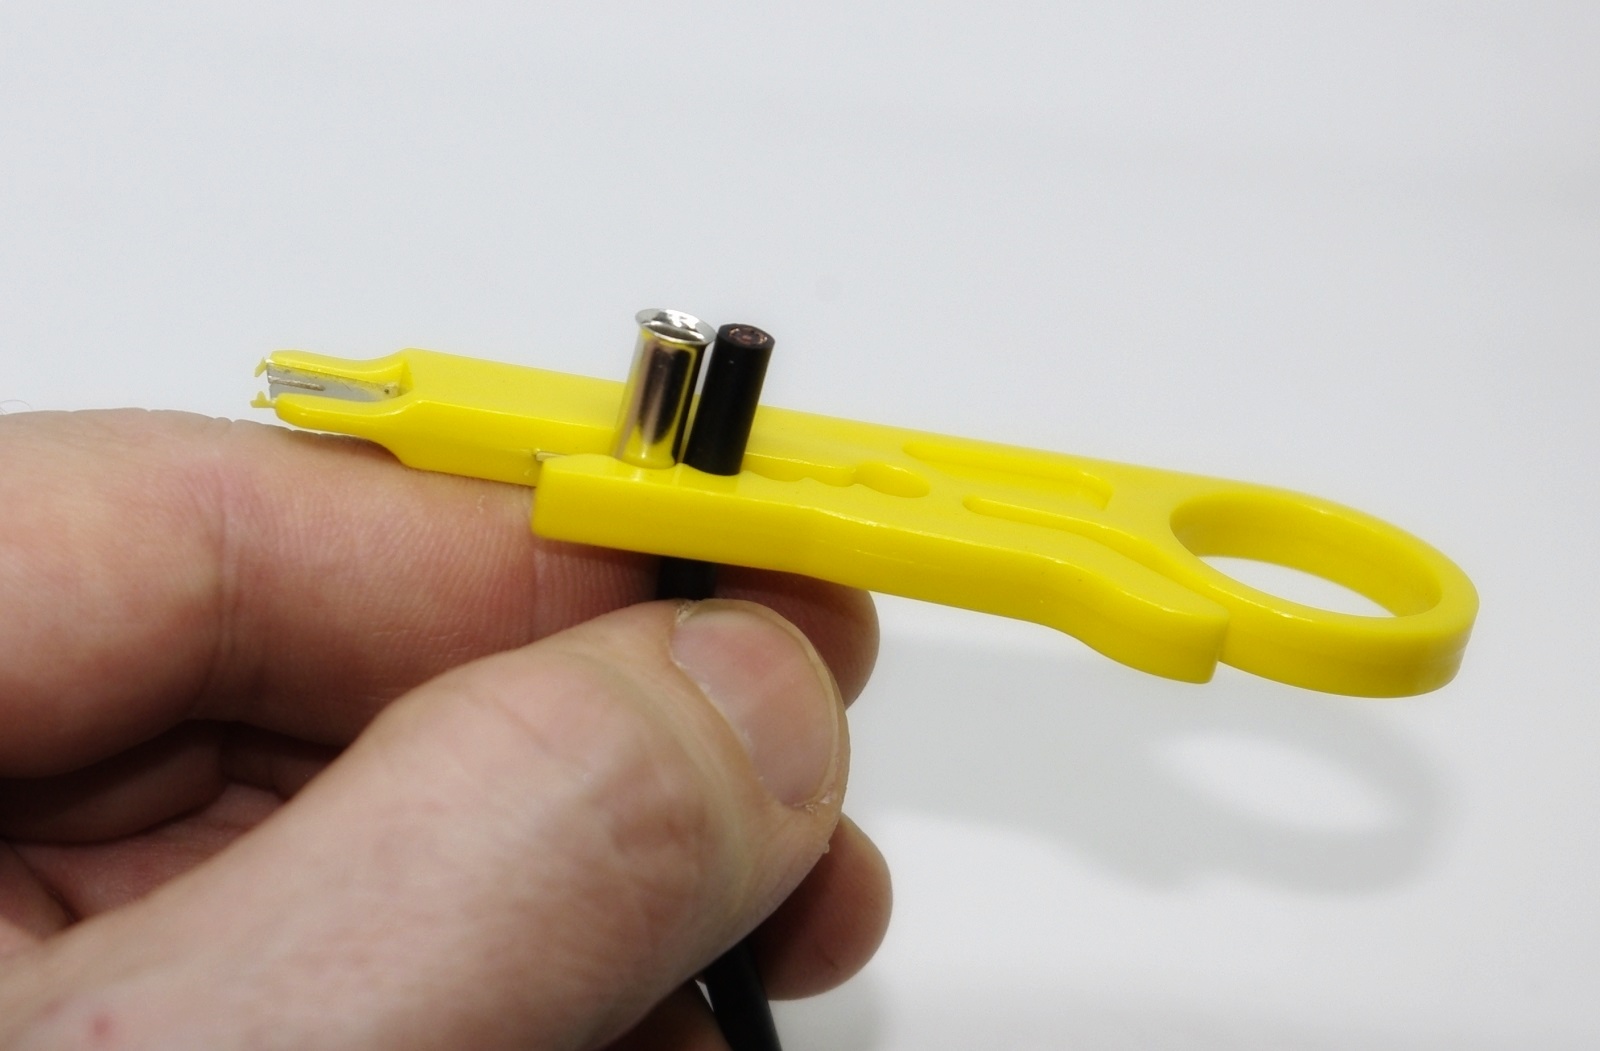
4. By the way, the tube is 12 mm long, put it into the adjacent slot and measure the length.
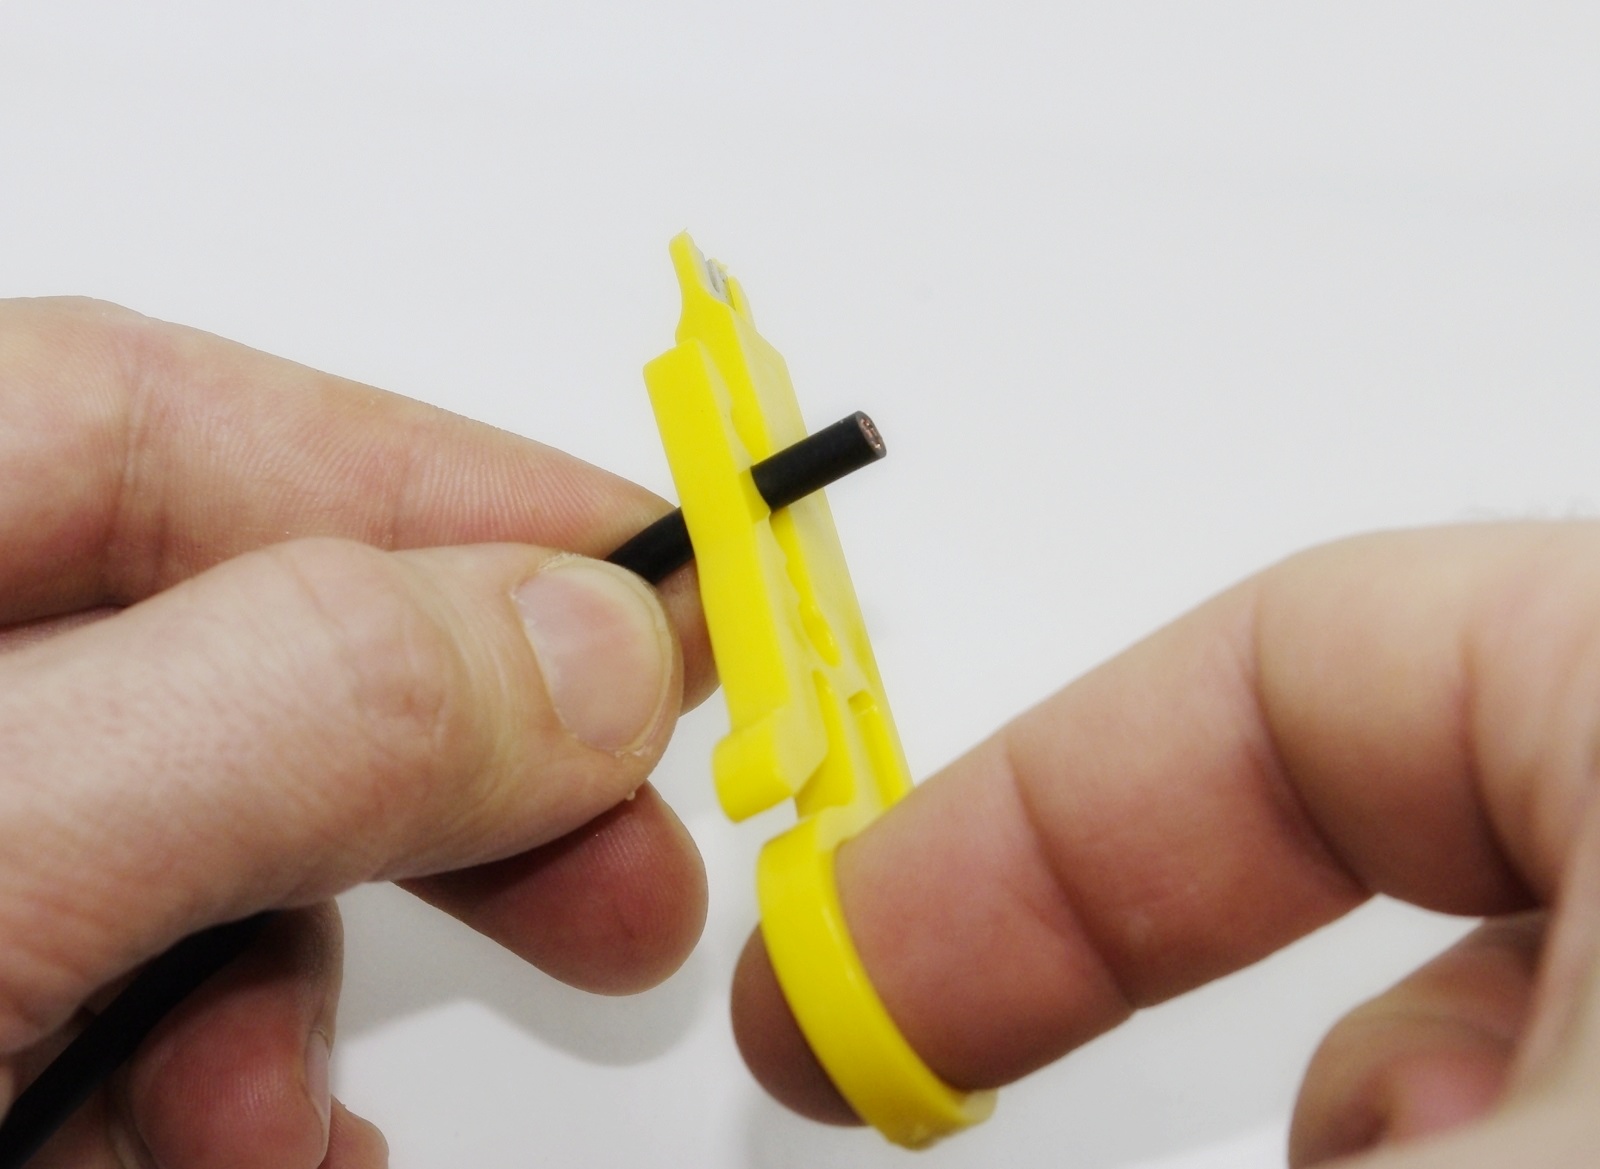
5. Take the stripper and the cable as shown on the picture and make one or two turns. The outer isolation will be cut.
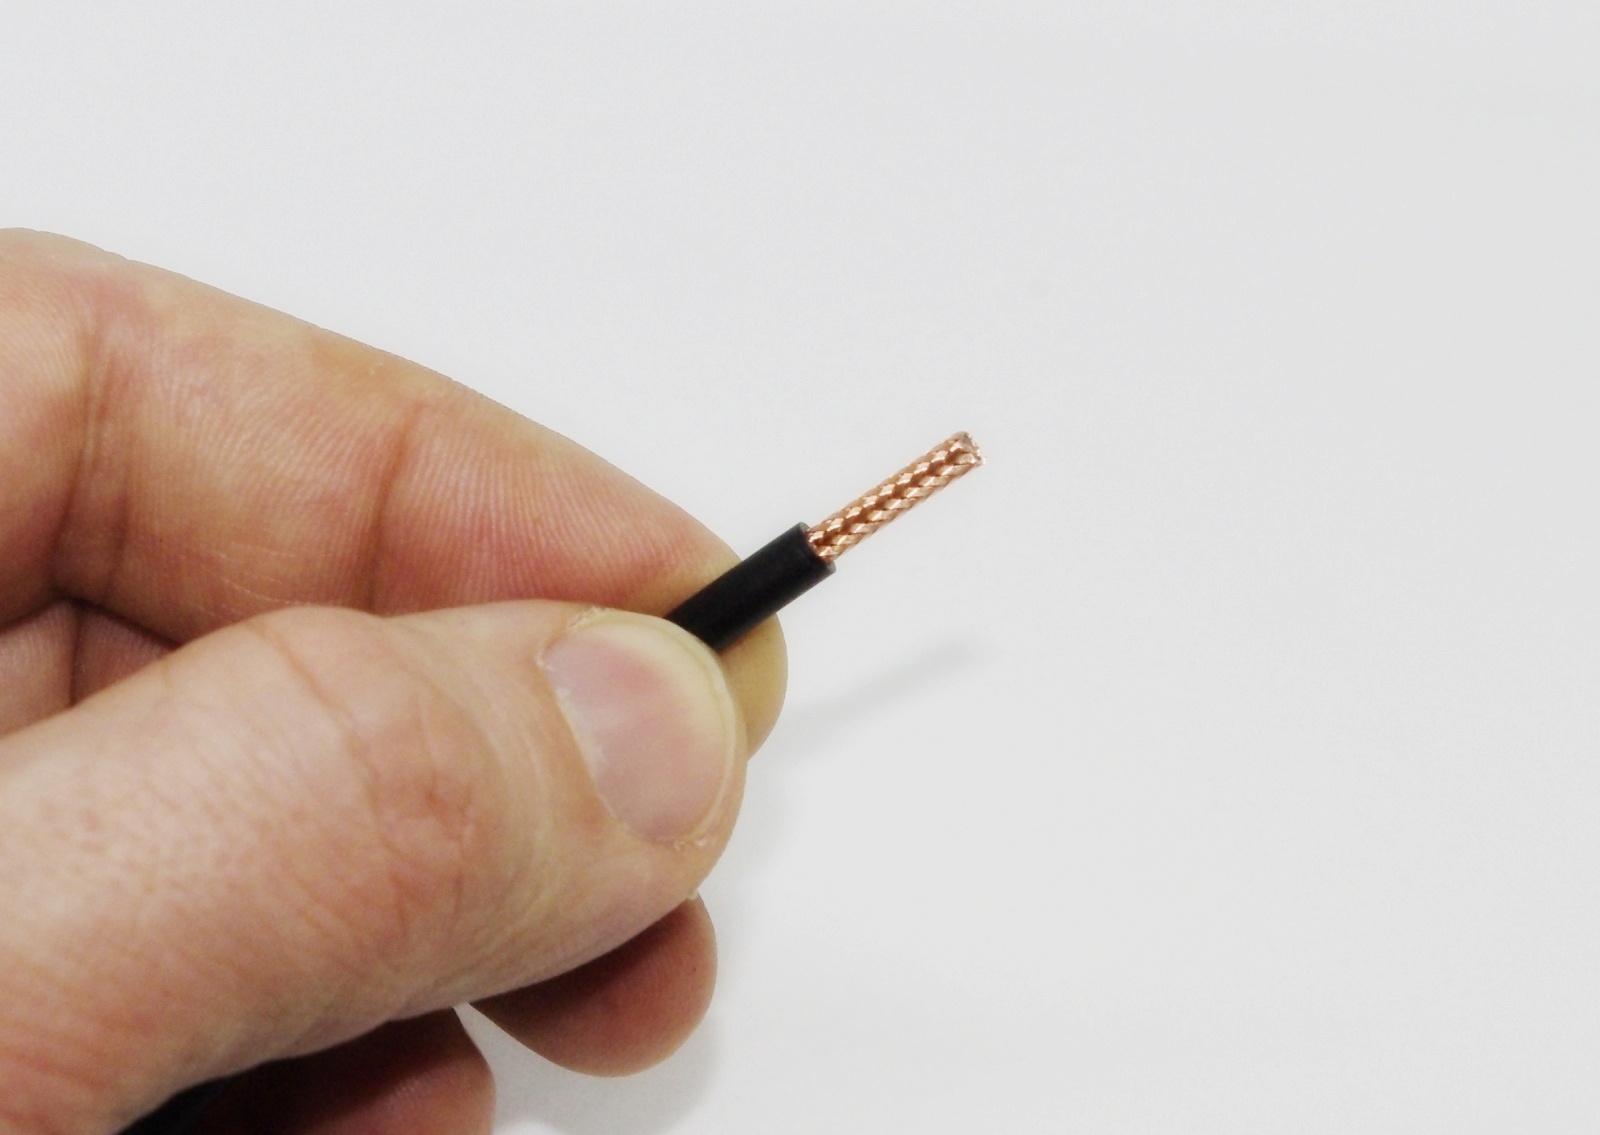
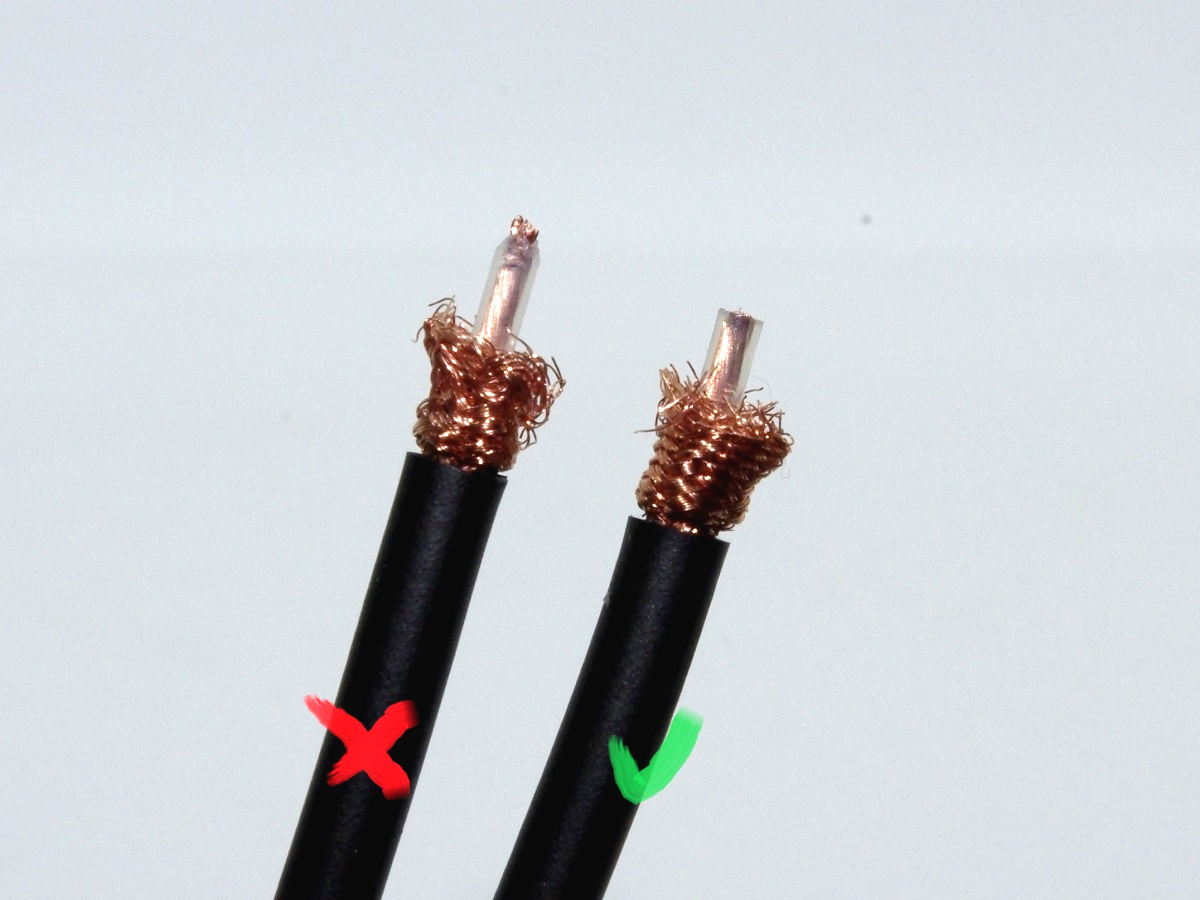
6. Remove the isolation. If you get the same result as shown on the picture move on to slide 10.
7. “Profy” kit contains special stripper (also can be ordered separately). Just put the cable in line with outer side of the stripper and make one or two turns. It will cut exactly 12 mm.

8. If you don’t have a stripper or ordered “Test” kit, you still can use tube sleeve to measure 12 mm. Then use a knife to carefully cut off the isolation.

9. Pull the cable to make sure you don’t cut the shield and make another cut on the side. Usually it takes three cuts to remove the isolation.

10. Pull the shield away from the edge, try to maintain its round shape, you will need it to put the shield back later on.

11. Now remove the additional plastic screen. Make a couple of light cuts near the edge of the shield, it should be easy to remove the screen, it’s thin and soft.
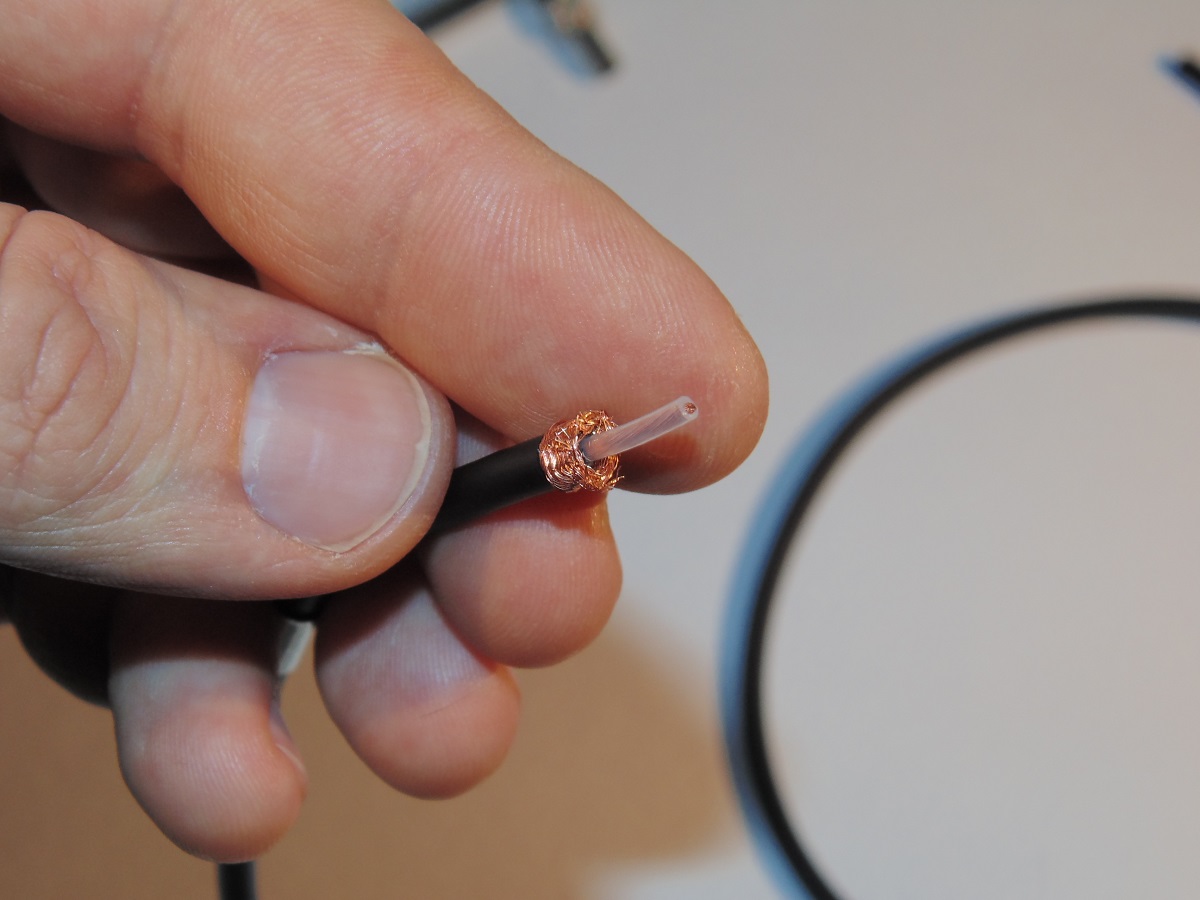
12. White isolation around the wire should remain in place. By the way, you can remove the plastic shield with your nails, but be careful not to pull the central wire. We suggest using the knife.

13. Cut 4 mm of the central wire. Again, cable diameter is 4 mm so you can use it to measure the length.
14. Use a sharp knife and a solid surface to cut the wire. You want to get a straight cut and don’t have copper wires sticking out of isolation.
15. If you have a “Profy” kit stripper, then just put the cable as shown on the picture, it will cut precisely 4 mm of the cable.

16. Each kit contains a small vial of Kontakt-61 compound, it prevents losing electrical signal and rust. Use it to ensure your cable lasts for years. You can assemble the cable without the compound though.

17. Open the vial and hold it horizontally, so that liquid does not pour and it is easy to dip the wire into compound. You need to touch the compound with the tip of the cable to make sure the connection is good.

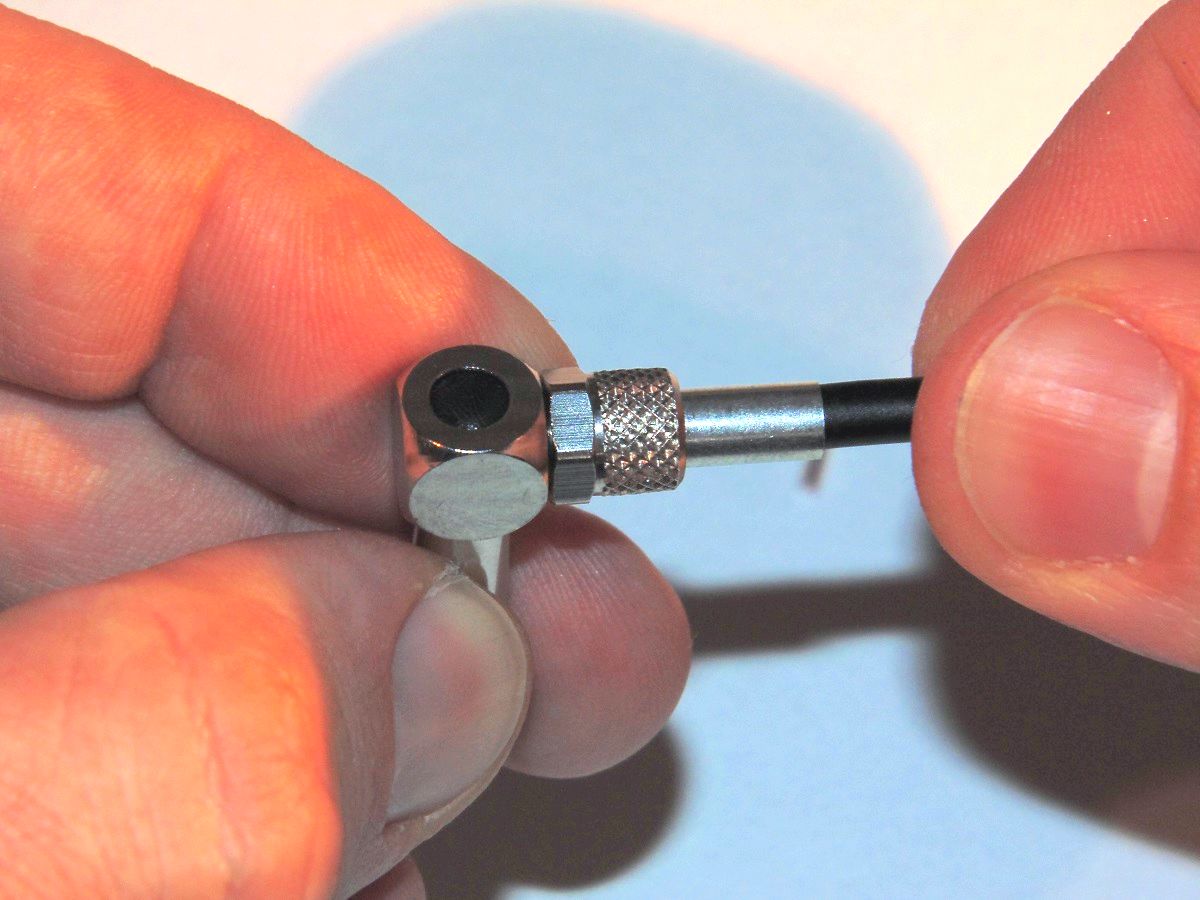
18. Plug the cable all the way into the connector. There is a needle inside the connector that pierces through the wire for 7 mm to ensure reliable contact with the central wire.
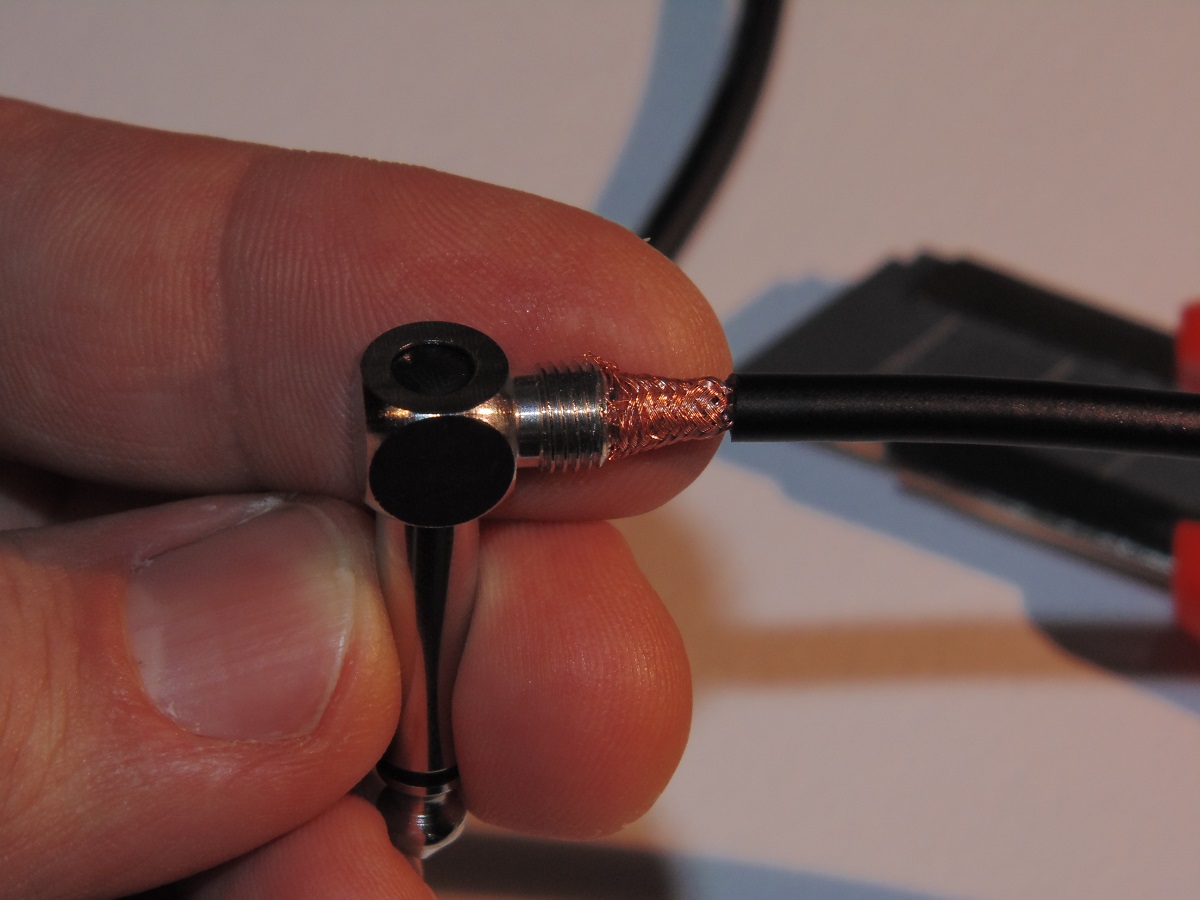
19. Pull the shield over the connector, it should spread and barely touch the thread.
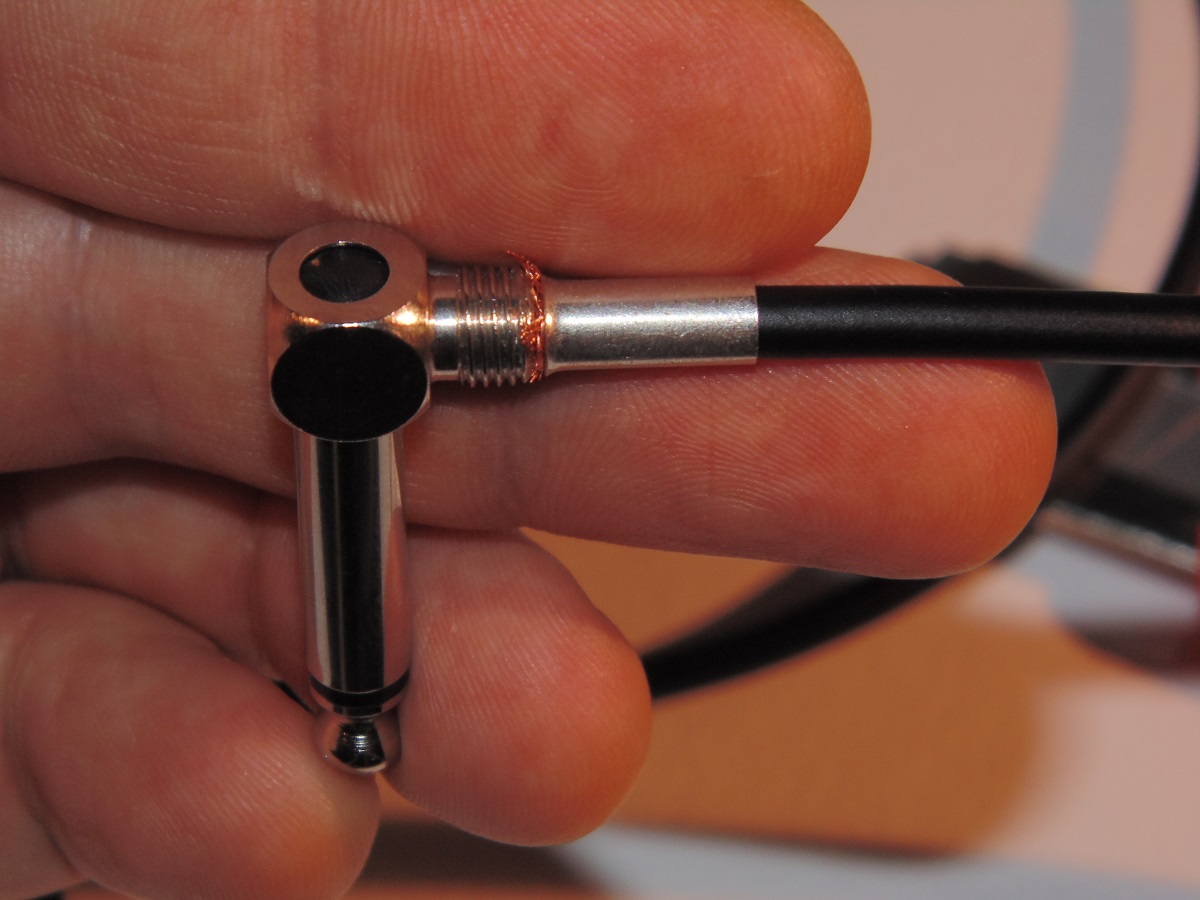
20. Fix the shield with a tube sleeve as shown on the picture. It’s OK if a small amount of copper shield is left over the thread.
21. Tighten the nut and it’s ready! The strength of the connection is only limited to the strength of the copper shield, moving the cable around won’t have any effect on the sound!
It will take less time to assemble your first cable than to read this instruction. And after assembling the second cable you won’t need the instruction at all. Use this small scheme as a reminder.